By now, everyone knows that I'm a cold weather rider. I will push the season as far as I possibly (and safely) can. I've always got my eye out for anything that would make my rides more comfortable and possibly safer.
Before I go into the more comfortable part of this post, I want to address the "safer" part of it. You see, I have a set route to work in the mornings. It gets me to work in a decent time, avoids most traffic and gives me the best chance at green lights (goggles fog up faster when you stop...go figure). Part of my regular route has suddenly become a life threatening situation. There is a section of the road on the opposite side of a rise that (I can only guess) has a broken water pipe under it. That means that it is always covered in water, day or night. Add to that the fact that morning temperatures are always around 0 C (32 F) and you have a situation that becomes deadly.
I didn't know about the water and I also couldn't see it in time as I approached the rise. By the time I saw it, it was too late to swerve or stop. As soon as I hit the water I knew it wasn't liquid anymore and any attempt to control Selene had gone out the window. The rear wheel broke loose immediately and the entire bike started to wobble. My only saving grace was the fact that the ice patch was only small. When rubber met actual pavement again, Selene straightened up and we were flying straight once more.
I tell ya...I was quite awake after that experience and I learned that motorcycles should not be taken on ice without some extra precautions. Like outriggers or spiked tires.
So now I have a different route for work until they fix that portion of the street.
On the issue of comfort... Recently I've been turned onto Mark's Work Wearhouse and the fantastic things they have. I purchased new jeans that were fully put to the test today. These jeans are painter style with thick jean material lined with felt. In zero degree weather my legs barely got cold. It was amazing and I may have to buy a couple more pairs. This place may actually be my new clothes store.
The only thing I'm having an issue with now is my gloves. The previous "cold weather" ones I purchased now equal crap. My hands are numb by the time I get to work and that is just unacceptable. Cold is one thing, but painful is another. Looks like I have some shopping to do.
Showing posts with label review. Show all posts
Showing posts with label review. Show all posts
Prolonged Jafrum helmet review
While browsing my own archives I realized that I'm behind on a few things. One in particular was a review of the Jafrum helmets that were purchased last year. I was supposed to give a full and final review after a month of use...oops.
So here it is, the final review of our Jafrum shortie helmets.
The ones purchased were the 100 series DOT Beanie. I wanted a short style helmet and didn't really want to shell out a ton of money for another helmet when we already had brand new Icon Alliance SS helmets. The two Jafrum helmets cost less then one Icon helmet and that included shipping and duty.
I was very hesitant about buying helmets online due to the fact that you can't be sure they are going to fit properly. After measuring our heads twice and considering our Icon helmets were extra large (I find full face helmets are always bigger), we figured that a large would be fine for both of us. The website has a sizing page that was quite helpful in figuring out the size we needed. Upon receiving the helmets and trying them on, though, I realized we could have gone a size smaller. Joey's helmet is rather loose and so is mine. The only plus for me is that I always wear a do-rag or cap underneath it so it stays rather snug.
The helmet comes with a visor that attaches to the front via three screws. I removed mine and Joey kept hers on. It's easily removable and you can get a face shield that attaches to the same spot. The face shield is a separate purchase though and comes in clear, smoke or mirror tint.
The colour we went with was flat black, but it doesn't look like the helmet was actually painted. If I had to hazard a guess, I would say it was covered with a plastic/vinyl type of material. That works for me as I have found the helmet is very difficult to scratch. As a matter of fact, the only flaws on the helmet right now are some paint marks picked up from the occasional meeting with a wall.

The padding on the interior of the helmet is sufficient for its purpose. There are no hard spots or uncomfortable areas that take against the old noggin. There is even a nice pad that covers the crown of the head.

I was worried about the sturdiness of the straps. They felt cheap and it didn't look like they could take a lot of stress. The inside of the strap is felt lined, but the exterior portion seems to be made of a vinyl type of material. Contrary to what I thought, it has held out rather well. If anything, the straps have become more pliable and comfortable. Believe me, I don't treat the helmet like a baby. I want this one to have a used look and it has more then easily dealt with my punishment.

The only real complaint I have is about the buckle. It came with the seat-belt type strap closure and it's kind of finicky. Once it's closed, there are no problems and it won't easily let go, but the real problem is getting it to click into place. Sometimes it can take a bit of effort to get it to snap in. You can double or triple that effort if you are wearing gloves. The release button is really small and next to impossible to handle with gloves on, let alone bare hands. I've had my issues with it, but Joey is always having problems getting it to snap closed. On the plus side they do have the D ring loops as well, but the only way to use them properly would be to cut off the seat-belt closure. Otherwise the seat-belt portion flaps around in the wind.


We purchased these helmets last August in hopes of being able to wear them when we took our trip to Niagara Falls. We wore the Icons for the trip up and back, but used the Jafrum helmets for any rides around the Niagara Falls area. For the trip, the Jafrum helmets were bungee netted to the top of our luggage and were submitted to heat, cold and one very wet evening. They survived it all without a problem and mine has become my regular helmet. The other night, I took out my Icon to go for a short ride and realized that it was still covered in all the bugs that we had picked up from our trip back from Niagara Falls. I chuckled to myself as I realized that the cheapy little helmet had become my favourite to wear.
I like the open air feel of the beanie/shortie and it's as close to no helmet as I'm going to get in Canada. As for the Jafrum brand, it gets a thumbs up from me. The build quality is good, it's comfortable for long periods and it's quite affordable. Would I buy from them again? Definitely.

Finally
I've been holding off blogging about my new order just in case things ended up with me being disappointed. As of today, I can gladly say that I'm far from disappointed. As much as I would love this to be a review of the installation, it's going to have to be a review of the shipping. The weather out there is crappy and I don't have the tools nor the time
Today I received my order from Tsukayu.

As you can see, it was well packaged. The box itself took a few knocks and was actually broke open in a couple of spots, but it was wrapped in plastic so nothing actually went through the box.


The items were wrapped in a double layer of foam wrap as well as being encased and separated with styrofoam sheets.
I'm always nervous about unwrapping things like this. I hate seeing things so nicely wrapped only to discover that it still didn't protect it. We all know what the mail is like. No matter how many stickers you put on there announcing that it's fragile, there is always someone who just doesn't care.


Much to my delight, there wasn't a mark on them.
They were covered in dust and bits of foam, but that was nothing a good polishing rag couldn't take care of. I am thoroughly impressed with the finish of these saddle bags. They have a mirror finish with no imperfections at all. I'll have to coat them with a few layers of wax to make sure they are well protected.

The details really make these worth it. The new latch style they are using really looks nice. it used to be a barrel style that was set into the case itself. The new chrome latch helps keep the lid closed tightly and really looks nice against the black.

One of the big selling points for me was the felt lining. In comparison, the National Cycle saddle bags cost twice as much and don't come with any kind of lining. The rubber seal looks pretty sturdy and will definitely get tested out with the weather around the Maritimes.

The prop seems sturdy and holds the cover up quite nicely. It locks solid and doesn't flex either. As of right now I have to release the prop lock myself. I'm guessing that's just because it's new and a little stiff. It doesn't bother me either way as long as it keeps the cover up.

The only thing that really bothers me is the plastic hinge on the rear. It's black, so it doesn't show up that much, but I would rather it be chrome. I'm afraid that this type of plastic may not weather well and could quickly become discoloured. I may replace them with chrome hinges myself, but I have other things that are a higher priority than that.

The mounting hardware was wrapped in bubble wrap and foam wrap which in turn was surrounded by a styrofoam box which was, again, wrapped in foam wrap. Each of them was placed inside a saddle bag. I have to hand it to the packers, short of being dropped from a plane, nothing was going to happen to the mounts.

The mounting hardware is quite different then what I'm used to seeing. Apparently they are designed to keep the cases as close to the bike as possible. The metal is quite thick and sturdy, but I have to wonder if they are strong enough to support the cases. In my searches for information on the internet I never encountered one complaint about this type of mount, so I'm guessing I won't have any issues. Besides, you aren't supposed to overload your saddlebags for safety reasons.

Last, but certainly not least, is the bag-O-parts. In here are all the little things you need to make sure the cases stay on the bike. A very good thing indeed. As you can see, there are keys in there. The locks on the latches are very real and will only open with those keys. I figured they would be the "pretend" locks that you can get, where almost any key will open them. I have one of those locks on my Kawasaki's gas cap. I could use my house key to open it. I'm not quite sure if you can tell, but they supply three keys for the cases. That is very handy for a forgetful person such as myself. One key will stay home, one will be with me and one will be with Joey. As you can tell, I've had experience with "misplacing" keys.
All in all, I am not disappointed with choosing Tsukayu. Total cost for the cases came to $643.31CAD ($539.00USD) and it took approximately 25 days (from order date to delivery date) for me to receive them. I know that seems to be a long time, but you have to keep in mind they came from Hong Kong.
In comparison; the National Cycle Cruiserliner Saddlebags are $649.99USD and you have to buy the mounting hardware separately for $229.95USD. Not including duty (which can be high and you can't get away without it paying now) that's $879.94USD ($1001.37CAD)...yikes. And that's without felt lining and an actual chromed latch.
I know the Cruiserliner Saddlebags would be easier to install and I know that National Cycle is a great name, but I just can't justify that much for a set of hard saddlebags. And no, I wasn't about to buy soft ones. Soft bags just aren't my style and some of them are just as expensive as the Tsukayu ones I now have.
I also have to compliment the staff. Mavis and Yoko (the two I dealt with) were more then willing to answer any questions and were very prompt with all replies. Tsukayu was probably the friendliest and most helpful online dealer I've every had the pleasure of communicating with.
Now the bad news. I'm not going to have time to mount them anytime soon. I'm back into my weekend rotations at work and it will be a month before I have actual weekends again. It has to be done on the weekend due to the fact that my Dad has all the cool tools and this is definitely not a one man job. So, the next installment of this review will come at a later date and will be more detailed with just as many pictures...if not more. For the time being I'll just watch the snow melt...or accumulate...*sigh*
review 2 & 3
so, i've put the gloves through their cold weather paces.
on saturday i was on a rather long term ride. we had to take the car in for it's annual inspection and we pretty much knew it wasn't going to pass, so i was the backup for transportation. that also meant that i was doing a lot of running around chasing joey while she tried to find a place to take the car in (not to mention me taking directions wrong and going to the opposite end of the city).
the temperatures hovered between 2 and 10 degrees celsius with light winds. i ended up being on bike from around 11am to 7pm (or so). mind you, this wasn't all straight riding, there were the occasional stops at stores and getting food (Wendy's spicy chicken burger with chili...mmm...warm).
before i say anything about the gloves, i'll say this: my hands are hardly ever warm. i have a problem with circulation and no matter what i do, i can't keep my hands warm when i'm outside (barring warm weather). back in my hometown i would spend a lot of time on ski-doo and there was nothing that would keep my hands warm. i tried every pair of winter gloves and nothing would work. i just gave in and suffered.
all that being said, i think the gloves worked pretty well. they did a fine job at keeping my hands from freezing for the entire day. after an hour or so, i did notice the tips of my fingers getting cold, but they weren't numb and they didn't get numb the whole day. this is a vast improvement over my winter gloves and my regular riding gloves.
the comfort is top notch as well. from the get-go they are very flexible and nothing pushes uncomfortably against your hands. i can easily grip the handle bars and reach the levers with no problems. they are a bulky glove though. if you are looking for something that you can easily pick a key out of your pocket...forget it. i can only do that if there is only one thing in my pocket...with luck. there is no way i can differentiate between objects in my pocket with three layers of material over my hands. that being said, i can use a key with no problems and i can zip up my jacket. I can't unbuckle my helmet though and it's kind of comical when i try.
review number three comes from this mornings ride to work. it takes me about 30 minutes to get to work with a quick stop at the local Java Moose outlet for my mocha-cino (yeah, i'm the big mean biker...lol). this mornings temperature was around -3 degrees celsius. in that cold my hands were numb in my regular gloves and with my winter gloves my fingers were numb. the new gloves performed great. i don't expect my hands to be toasty warm when i get to work, but i do expect to be able to use my hands and for them not to ache. these gloves did that for me. lets face it, in freezing temperatures, there isn't much that's going to keep you warm for extended periods of time. add to that the fact that i'm creating my own wind chill and i don't want it to look like my mom dressed me for a snowstorm.
so, in my books, the gloves were well worth the money spent. the last test i'll need to perform is a water proof test. that will most likely happen on my next few days off.
the gloves
ok, as promised, here are my new gloves. :)
i picked these up at the local H-D dealership, the same place that i got Selene. they treat me well, so i'm always there bugging them. i was lucky to have a 50 dollar voucher for this purchase as the gloves were around 60 bucks. i picked up the gloves and an insulated leather face mask.

for the most part...i have no idea who makes these gloves. there were a bunch of tags on them, but nothing identifying the brand name. let's start off with the first tag.
Thinsulate: microfiber technology that provides warmth without bulk for greater comfort.
Hipora: a water proof liner that shuts out water, but allows moisture or warm steam from the body out.
Cordura: a light, but durable fabric that's resistant to tears and punctures.
Schoeller-Keprotec: a kevlar containing material that has extreme tear resistance.
so...yeah...there is a lot in these gloves to keep you safe and comfortable. i still have no idea who makes them though. it's almost like all these companies got together and said, "hey! let's put ALL our products in one pair of gloves!"
i have to admit, the build of the gloves is nice. the sturdy look is complimented by double stitching everywhere. the wrist strap keeps the gloves snug and the gauntlet has enough room (due to the Velcro strap) to fit over the thick cuff of my leather jacket.

as you can see from the palm view, there is a lot going on. the double stitching applies here as well which is a blessing. if a motorcycle glove is going to give out on you, it's going to happen on the palm portion. i recently destroyed a brand new pair of winter gloves due to the constant twisting of the throttle. the one part on the palm that i love is a strip of leather that runs from the thumb to the index finger. it adds a lot of grip and pretty much gives me the ability to crank the throttle with just a thumb and a finger.

unfortunately (fortunately, actually) our cold snap has all but gone, so i haven't had much of a chance to test how warm they are. we have been having a ton of rain though, but i really don't feel like riding to work in the rain just to test out the gloves. i've got better water proof tests in mind, like wearing them in the shower...wait a minute...that's just weird...
so far, i have nothing but praise for the gloves, but like i said...i haven't had much of a chance to fully test them. they are very comfortable and not at all restricting when riding. the couple of times that i've been on the bike my hands have been sweating, so i'm taking that as a good sign.
i'll be riding for sometime yet, so i'll have plenty of time to give them a full workout. expect updates on them in the coming weeks.
first impressions
ok, so my first time out with the new helmet was a crazy new exprience. for every bike i have owned, i have also owned a full face helmet. i have always been fully protected and fully enclosed. there was once or twice where i was able to get on an abandoned dirt road and ride a little with the helmet off, but that's about it.
the day i got the new helmet i honestly wasn't thinking there would be much of a difference. not sure why i thought that, but i did.
i put it on and walk into the bathroom to look in the mirror. all i could do was laugh at myself. i looked downright silly. but once all the gear was on, it wasn't too bad. i just kept reminding myself of what the nice woman at the dealership said, "everyone looks silly in them." i know it's not really true, but it makes me feel better.
well, no better excuse to go for a ride then a new helmet. off i went.
i sat on the bike and started her up. wow, i could hear everything. the hum of the engine, the growl of the pipes, everything around me. it was really odd sitting there knowing that this is what it would be like when i got moving.
clunk, first gear and off i went.
once i got up to speed, all i could think was, wow, i can't hear anything! i could no longer hear the bike, me, or anything around me. i kept thinking; why would anyone wear this? i laughed at the fact that i had been spoiled by full face helmets.
after a bit, i got used to the wind noise and it just seemed very natural. the next thought; how can this be legal? it felt like i was wearing nothing on my head. now i knew why people liked these helmets! it was the closest thing to riding without that you can get.
another little while and i was hooked. my wrap around glasses kept all the wind and flying debris out of my eyes so there was no discomfort at all. it just felt right. now all i can think is how closed in my full face is going to seem. ;)
the next day me and joey decide to go for breakfast and give the helmets a good run. this meant a short jaunt through town and up the highway to a gas/diner spot. it's cloudy and overcast and the weather page isn't forecasting rain. heh, you think i would learn by now.
half way through breakfast, it's starts pouring. so here we are with the new open helmets and no rain gear with a good 15 to 20 minute ride home. we were laughing the whole way home slowly getting more and more wet. and just when i thought we couldn't get more wet, we did.
the glasses did well for keeping the water out of my eyes. still, my brain reaction kept making me squint for protection when i didn't need to. the only bad part was the rain hitting my lips. damn that hurts! like little needles. really can't deny how fun the ride was though.
so i'm hooked on the small helmet. i still won't use it for long distance rides though. not only would i go deaf, but i just wouldn't feel as safe. they will come with us for the upcoming Niagara trip though. they will be great for the group rides. ;)
the day i got the new helmet i honestly wasn't thinking there would be much of a difference. not sure why i thought that, but i did.
i put it on and walk into the bathroom to look in the mirror. all i could do was laugh at myself. i looked downright silly. but once all the gear was on, it wasn't too bad. i just kept reminding myself of what the nice woman at the dealership said, "everyone looks silly in them." i know it's not really true, but it makes me feel better.
well, no better excuse to go for a ride then a new helmet. off i went.
i sat on the bike and started her up. wow, i could hear everything. the hum of the engine, the growl of the pipes, everything around me. it was really odd sitting there knowing that this is what it would be like when i got moving.
clunk, first gear and off i went.
once i got up to speed, all i could think was, wow, i can't hear anything! i could no longer hear the bike, me, or anything around me. i kept thinking; why would anyone wear this? i laughed at the fact that i had been spoiled by full face helmets.
after a bit, i got used to the wind noise and it just seemed very natural. the next thought; how can this be legal? it felt like i was wearing nothing on my head. now i knew why people liked these helmets! it was the closest thing to riding without that you can get.
another little while and i was hooked. my wrap around glasses kept all the wind and flying debris out of my eyes so there was no discomfort at all. it just felt right. now all i can think is how closed in my full face is going to seem. ;)
the next day me and joey decide to go for breakfast and give the helmets a good run. this meant a short jaunt through town and up the highway to a gas/diner spot. it's cloudy and overcast and the weather page isn't forecasting rain. heh, you think i would learn by now.
half way through breakfast, it's starts pouring. so here we are with the new open helmets and no rain gear with a good 15 to 20 minute ride home. we were laughing the whole way home slowly getting more and more wet. and just when i thought we couldn't get more wet, we did.
the glasses did well for keeping the water out of my eyes. still, my brain reaction kept making me squint for protection when i didn't need to. the only bad part was the rain hitting my lips. damn that hurts! like little needles. really can't deny how fun the ride was though.
so i'm hooked on the small helmet. i still won't use it for long distance rides though. not only would i go deaf, but i just wouldn't feel as safe. they will come with us for the upcoming Niagara trip though. they will be great for the group rides. ;)
jafrum helmets
have i ever mentioned how much i love getting packages in the mail? even if i know what it is, i love it. :)
anyway, new package from Jafrum arrived...well actually, i had to go pick it up due to the fact that our mail-person is too damn lazy to buzz our apartment. but i digress...my helmets arrived! of course, in my true fashion, pictures and opinions follow.
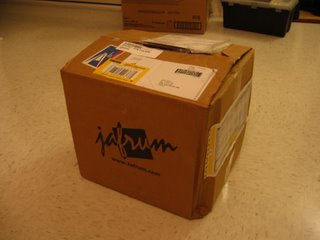
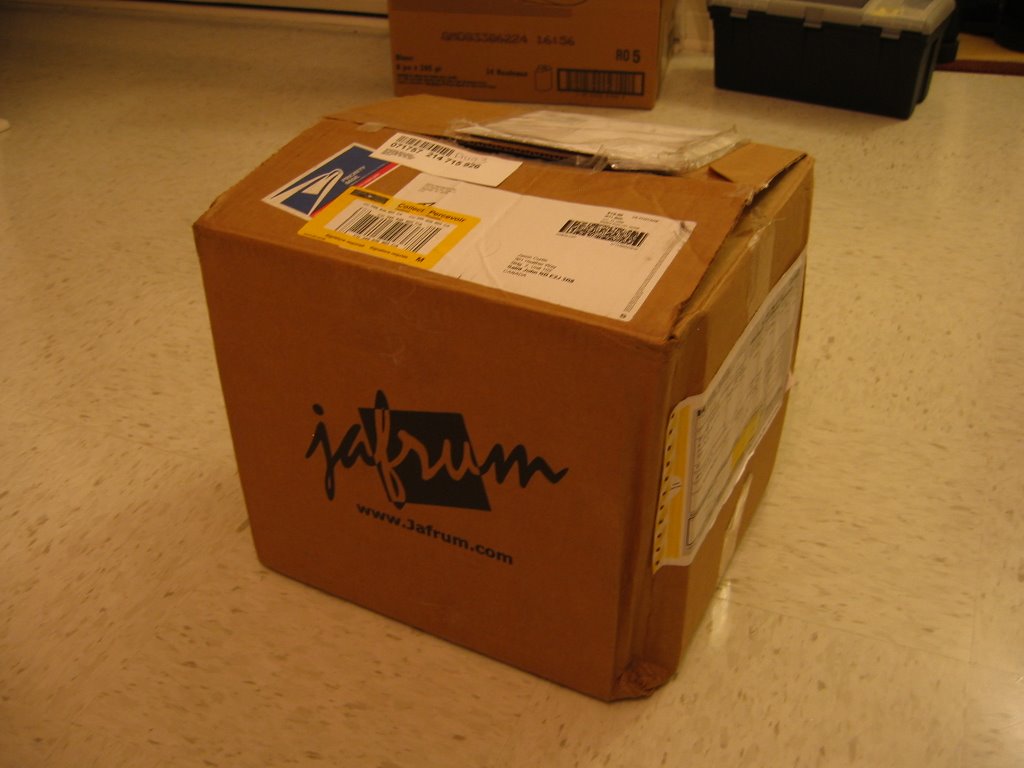
the box came in really good shape, no holes or punctures. i was actually a little worried about having helmets coming through the mail, but it arrived in better shape then i figured it would.
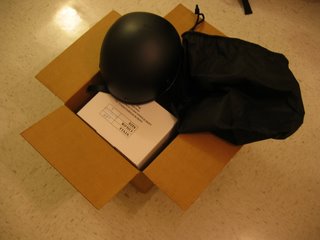
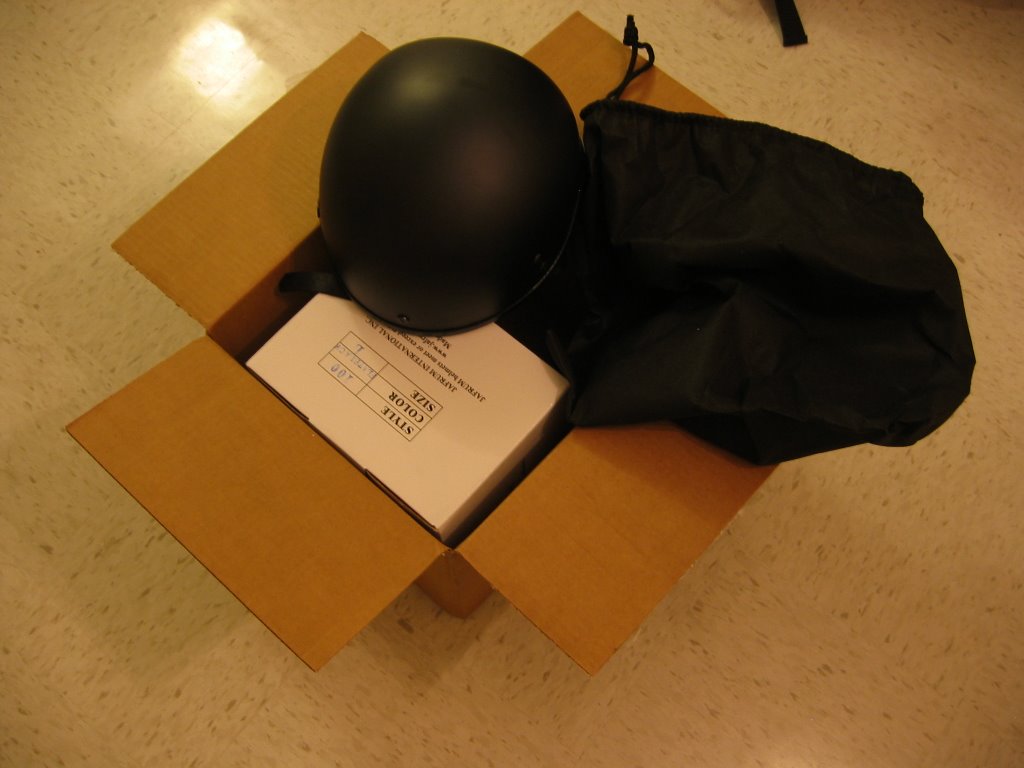
 here is the opened box. inside were the two helmets ordered for me and my wife. each helmet was in it's own "one size fits all" carrying bag (read: too big for the shortie) and it's own white box. no damage done to the inside boxes at all. this would mark my first experience with half helmets/shorties/skid lids/brain buckets/etc. and my thoughts will follow soon after this post.
 the helmets are identical, so what i say about one applies to the other. it's flat black with a small sun visor on the front. the visor can be removed by unscrewing three large screws in the front of the helmet. once removed, you will have to put the screws back in to fill up the unseemly holes. i removed mine as i thought the visor looked silly. joey left hers on, which should resolve in any confusion as to who owns what helmet.
the construction seems solid and the fit is good for me (size large). joey says that hers is a little large, but we both have the same sized head. i wear a bandana under mine, so it's pretty snug.
the strap system is my only real complaint. these helmets use a seat buckle type of system. while this should make putting the helmet on nice and easy, it ends up having quite the opposite effect. the buckle is small and rather tedious to snap in place, you often miss the entry point on the receiving end of the buckle. also, the adjustments are made on the part that buckles in. at first glance this seems pretty secure, but after a while of riding around it actually works loose and the helmet becomes somewhat mobile on your head. i have never been a big fan of buckle systems on helmets. in my consideration, the D-ring system should be the only system used.

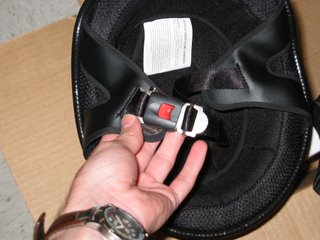 thankfully, there is another option. they had the foresight to leave the D-ring system on the helmet as well. the only bad part is the fact that you will still have the buckle hanging off the side of your head. i may do a little modifying with my trusty dremel tool.
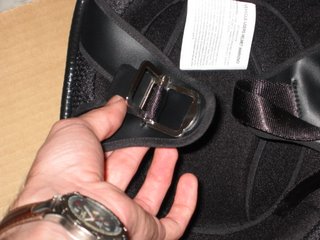 over all, the helmet is quite comfortable and i am in no way disappointed with my purchase. the padding inside is soft and i have found no pressure points at all. after a ride of several hours, i have found no discomfort at all.
i'll do a final review once i get a full month out of the helmet. that will give me a good idea as to what it will be like in regard to comfort and longevity.
mind you, this has not become my main helmet. this lid is only used for short hops and rides to work. my Icon Alliance full face will be my helmet of choice for any long distance riding.
anyway, new package from Jafrum arrived...well actually, i had to go pick it up due to the fact that our mail-person is too damn lazy to buzz our apartment. but i digress...my helmets arrived! of course, in my true fashion, pictures and opinions follow.
the box came in really good shape, no holes or punctures. i was actually a little worried about having helmets coming through the mail, but it arrived in better shape then i figured it would.
 here is the opened box. inside were the two helmets ordered for me and my wife. each helmet was in it's own "one size fits all" carrying bag (read: too big for the shortie) and it's own white box. no damage done to the inside boxes at all. this would mark my first experience with half helmets/shorties/skid lids/brain buckets/etc. and my thoughts will follow soon after this post.
 the helmets are identical, so what i say about one applies to the other. it's flat black with a small sun visor on the front. the visor can be removed by unscrewing three large screws in the front of the helmet. once removed, you will have to put the screws back in to fill up the unseemly holes. i removed mine as i thought the visor looked silly. joey left hers on, which should resolve in any confusion as to who owns what helmet.
the construction seems solid and the fit is good for me (size large). joey says that hers is a little large, but we both have the same sized head. i wear a bandana under mine, so it's pretty snug.
the strap system is my only real complaint. these helmets use a seat buckle type of system. while this should make putting the helmet on nice and easy, it ends up having quite the opposite effect. the buckle is small and rather tedious to snap in place, you often miss the entry point on the receiving end of the buckle. also, the adjustments are made on the part that buckles in. at first glance this seems pretty secure, but after a while of riding around it actually works loose and the helmet becomes somewhat mobile on your head. i have never been a big fan of buckle systems on helmets. in my consideration, the D-ring system should be the only system used.

 thankfully, there is another option. they had the foresight to leave the D-ring system on the helmet as well. the only bad part is the fact that you will still have the buckle hanging off the side of your head. i may do a little modifying with my trusty dremel tool.
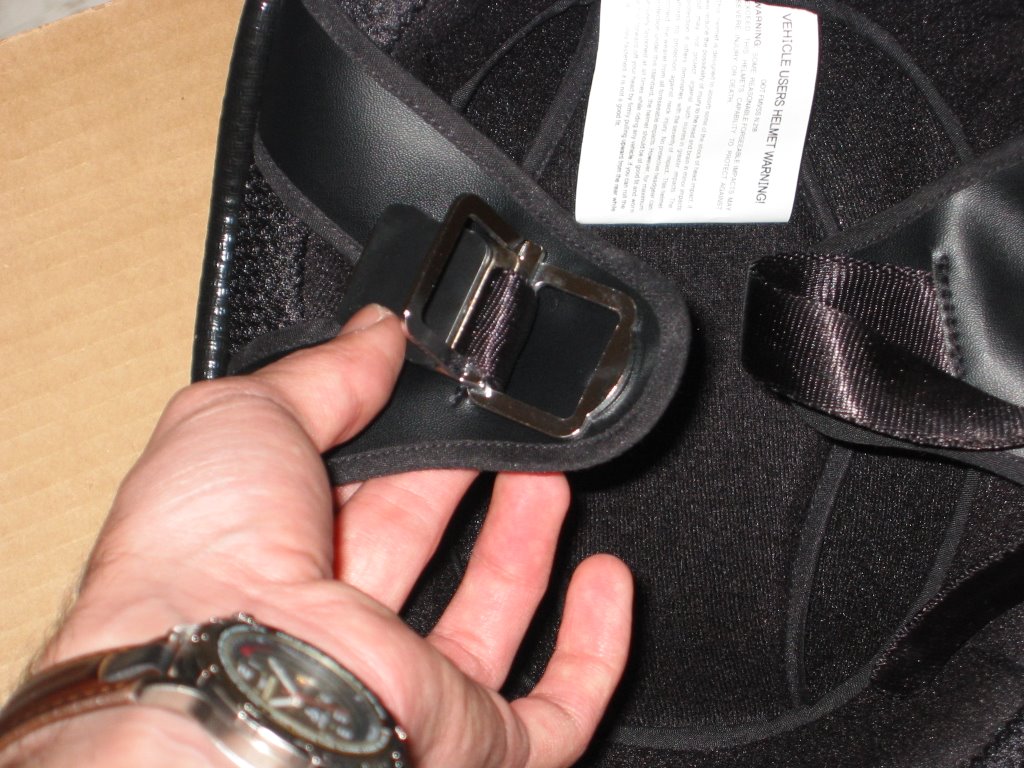 over all, the helmet is quite comfortable and i am in no way disappointed with my purchase. the padding inside is soft and i have found no pressure points at all. after a ride of several hours, i have found no discomfort at all.
i'll do a final review once i get a full month out of the helmet. that will give me a good idea as to what it will be like in regard to comfort and longevity.
mind you, this has not become my main helmet. this lid is only used for short hops and rides to work. my Icon Alliance full face will be my helmet of choice for any long distance riding.
bestem backrest installation
so, today my new backrest arrived. here-in lies the initial review and installation of the backrest. i almost forgot to continue taking pictures once i started the installation...lol. i apologise for the blurriness of some of the shots. my little digital camera's auto focus is a little willy-nilly.
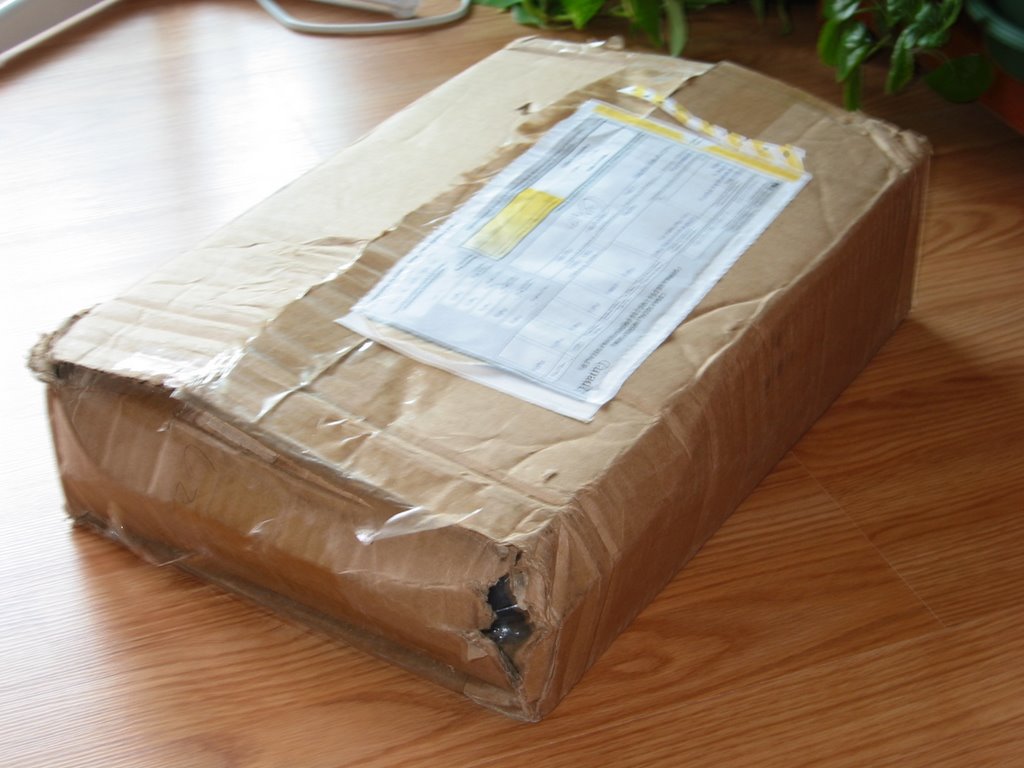
first off, Cruiser Backrest did a great job of shipping it to me. the box took a beating, but everything was wrapped really well and there was no damage to the actual contents. i expected it to be in worse shape for the distance it travelled (Miami to New Brunswick, Canada).
 once unpacked, this is what you have:
 upper left, backrest with pad. upper right, brackets sealed in plastic on cardboard. the bolts and nuts needed are sealed in there as well. bottom, the luggage rack. nothing was damaged due to the fact that it was all wrapped in foam and sealed in plastic.
the backrest itself is quite soft and has a really neat feature. the bottom of the pad has three snaps that give access to the interior padding. this would make it really easy to replace it if needed. also, the padding is wrapped in plastic which protects it from the elements.

 this leads me to my first irk with this backrest. i'm afraid that those snaps will slowly rust to pieces or rust shut. i live in the maritimes and we get plenty of fog and rain. as a matter of fact, it's raining and foggy right now. my bike is a 2006 and it already has some small rust spots on it. we'll see how long these snaps last.
these are the only tools you will need:
 we have one ratchet with a socket adaptor, a 100mm thumb wrench, an 8mm socket and a 12mm socket. that's it, that's all you need...well, aside from your hands and knees. ;)
ok, here is the part where i forgot to take pictures.
guess i was just too excited...lol. i'll just do the explanation here. i had to remove the two rear bolts that hold the chrome brace to the fender. be careful when doing this as there are little washers mounted with these bolts. i'm guessing that they are used to protect the chrome underneath. with that done i mounted the brackets with the longer bolts that came with the kit. first i put the bolt through the bracket, then put the original washer on the bolt. after that, i just used the 12mm socket to tighten them up. here i come across another irk. this one is more aimed at Honda. i'm not keen on mounting the brackets to the outside of the original chrome on the bike. at some point i may turn this bike into a one man cruiser and i won't be happy if the chrome is scratched or marred. that's why i put the washers where i said. hopefully they will protect the chrome...fingers crossed.
 i assembled everything piece by piece on the bike. you could just have easily put it all together first and then mounted it. i did it piece by piece because the fully assembled backrest is a rather snug fit and i didn't want to risk scratching the original chrome on the bike, or anything else for that matter.
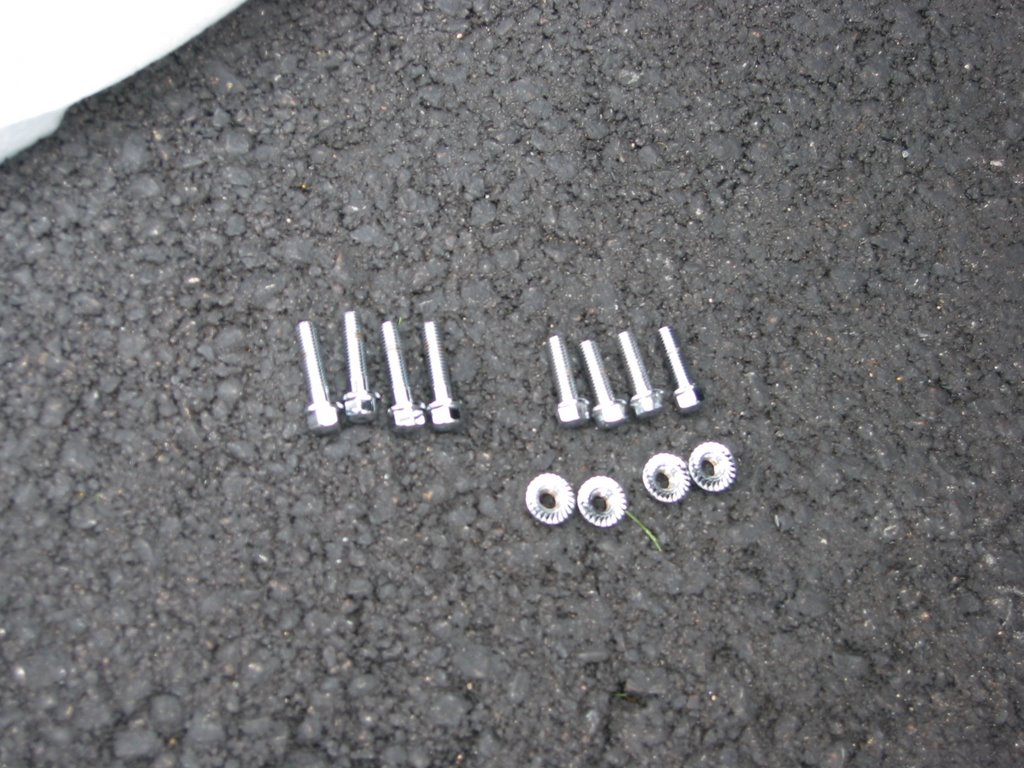
ok, with the brackets on we now have a choice. they pack two sets of bolts for attaching the backrest and luggage rack. if you only want the backrest, just use the short bolts. if you want the backrest and the luggage rack, use the longer ones.
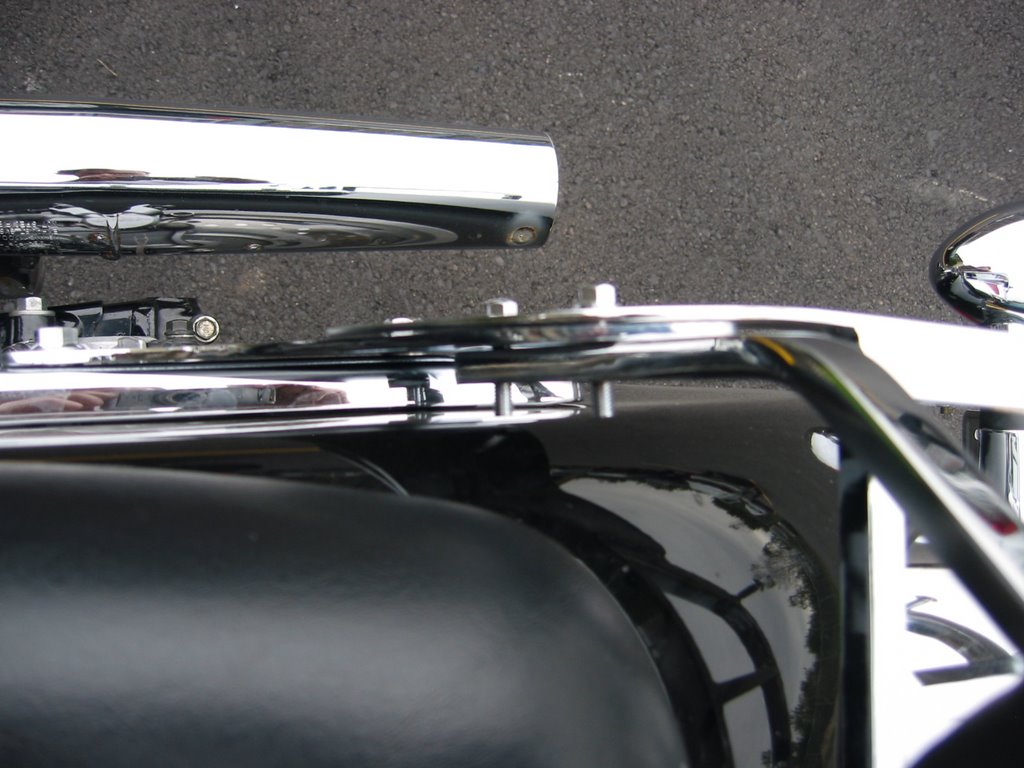
 here is the point where some people would rather assemble it before putting it on the bike. i had to balance the luggage rack on my knees while i straddled the rear fender. then i had to slip the backrest on and put a long bolt in either side. it was a bit of a balancing act, but i like causing myself trouble like that...lol. the backrest held itself in place pretty easy due to the fact that it is a really tight fit.
 here i am putting one of the small nuts on one of the longmounting bolts. as you can see, there isn't a lot of room to play around. you are very close to the fender here and once you get the thumb wrench in, you have no room for slip ups. i've already got on chip on my fender (no idea how) and i wasn't in the mood for another. as you can see, the backrest goes on the inside of the brackets and the luggage rack goes on the outside.
 once you have snugged the nuts and bolts by hand, pop out the ratchet, the 8mm socket and the thumb wrench. use the thumb wrench to hold the nut and ratchet those nuts snug.
 be very careful when tightening them up. these bolts are quite small and i'm sure that it wouldn't take much to twist the head right off or strip them. once they are nice and tight (careful with that thumb wrench next to the paint!) you can see how well all three pieces flow together.

 a little addition here that i wouldn't have thought of normally. i grabbed the top of the backrest and jiggled it to see if anything would move. lo and behold, the pad actually moved. it either worked loose from shipping or it was sent this way. regardless, there are too small bolts that you can snug up right on the back, just use the 8mm socket.
 i did a final once over and made sure the rest of the bolts were nice and secure and wiped off the myriad of finger prints. after that, it was gear up time. i hit the road with my ratchet in my pocket. i stopped every now and then to make sure everything stayed tight, which it did.
i was actually wondering if this would look ugly on the bike or take away from it's looks. but now that i look at the pictures, i like it. the luggage rack is solid (rated for 2.7 kg or 6 lbs), the back pad is comfortable (yes i sat up there to test it :)) and over all it's a nice match to the Sabre.
install: easy (with minor acrobatics)
construction: solid
longevity: in testing
first off, Cruiser Backrest did a great job of shipping it to me. the box took a beating, but everything was wrapped really well and there was no damage to the actual contents. i expected it to be in worse shape for the distance it travelled (Miami to New Brunswick, Canada).
 once unpacked, this is what you have:
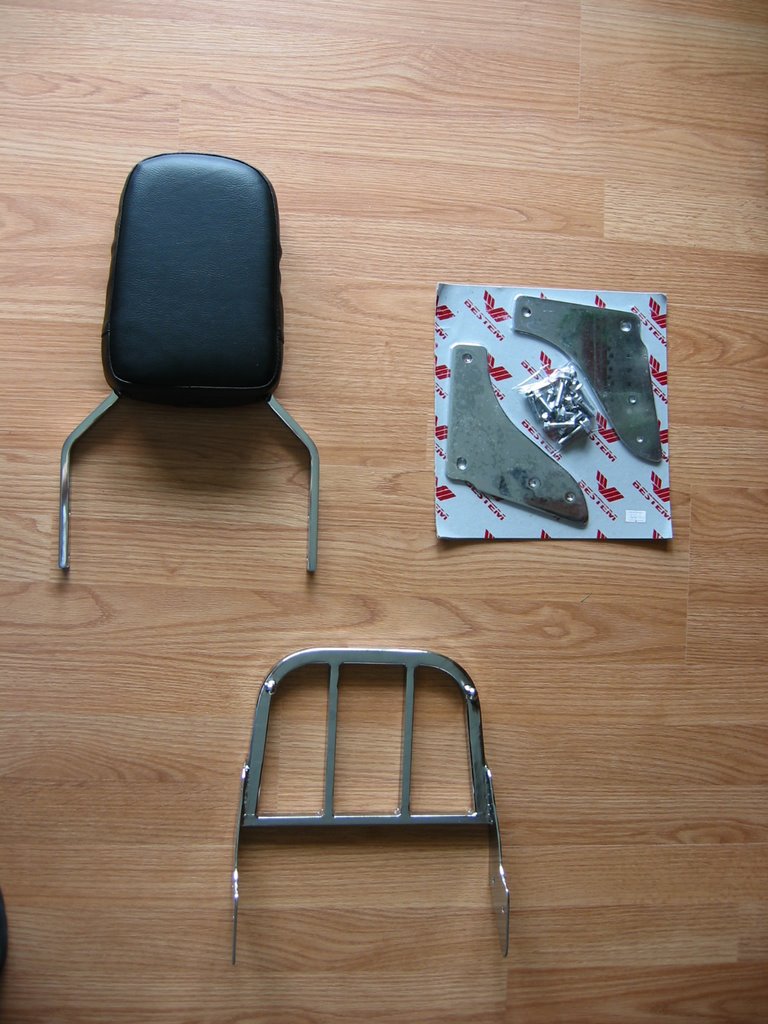 upper left, backrest with pad. upper right, brackets sealed in plastic on cardboard. the bolts and nuts needed are sealed in there as well. bottom, the luggage rack. nothing was damaged due to the fact that it was all wrapped in foam and sealed in plastic.
the backrest itself is quite soft and has a really neat feature. the bottom of the pad has three snaps that give access to the interior padding. this would make it really easy to replace it if needed. also, the padding is wrapped in plastic which protects it from the elements.
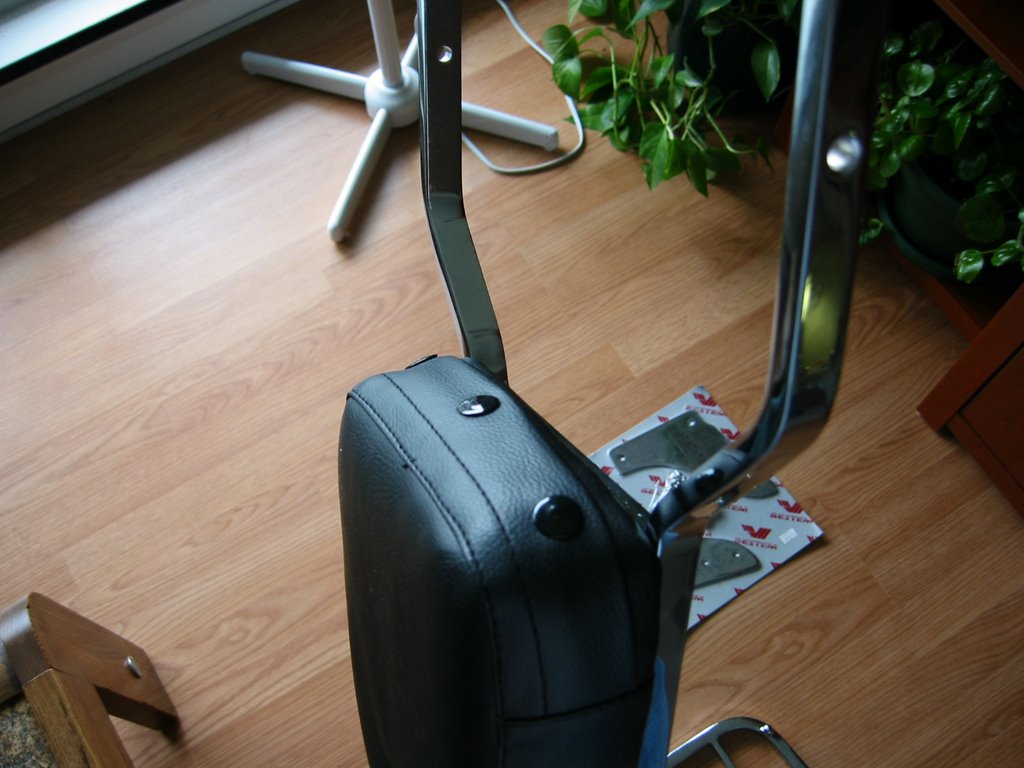
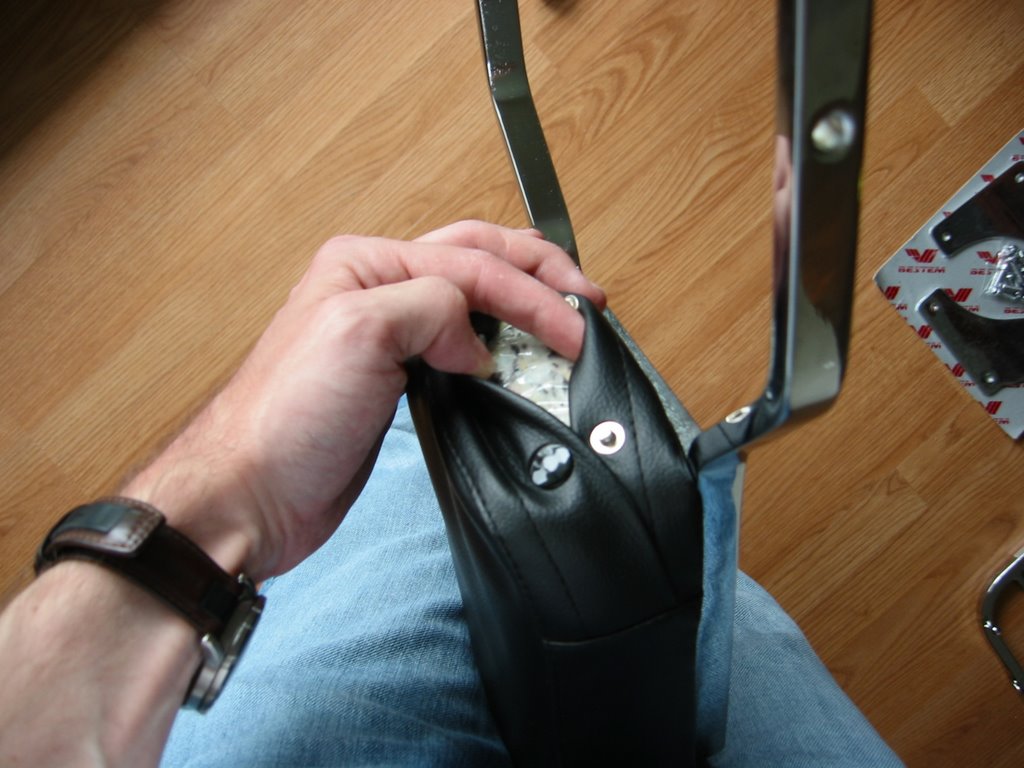 this leads me to my first irk with this backrest. i'm afraid that those snaps will slowly rust to pieces or rust shut. i live in the maritimes and we get plenty of fog and rain. as a matter of fact, it's raining and foggy right now. my bike is a 2006 and it already has some small rust spots on it. we'll see how long these snaps last.
these are the only tools you will need:
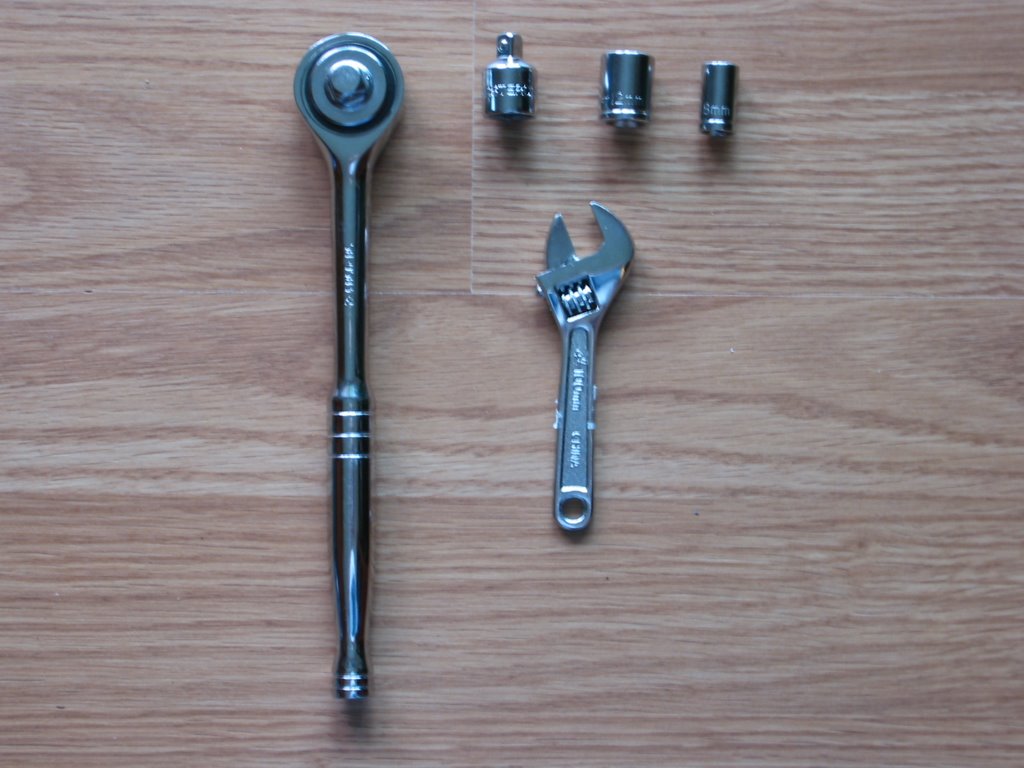 we have one ratchet with a socket adaptor, a 100mm thumb wrench, an 8mm socket and a 12mm socket. that's it, that's all you need...well, aside from your hands and knees. ;)
ok, here is the part where i forgot to take pictures.
guess i was just too excited...lol. i'll just do the explanation here. i had to remove the two rear bolts that hold the chrome brace to the fender. be careful when doing this as there are little washers mounted with these bolts. i'm guessing that they are used to protect the chrome underneath. with that done i mounted the brackets with the longer bolts that came with the kit. first i put the bolt through the bracket, then put the original washer on the bolt. after that, i just used the 12mm socket to tighten them up. here i come across another irk. this one is more aimed at Honda. i'm not keen on mounting the brackets to the outside of the original chrome on the bike. at some point i may turn this bike into a one man cruiser and i won't be happy if the chrome is scratched or marred. that's why i put the washers where i said. hopefully they will protect the chrome...fingers crossed.
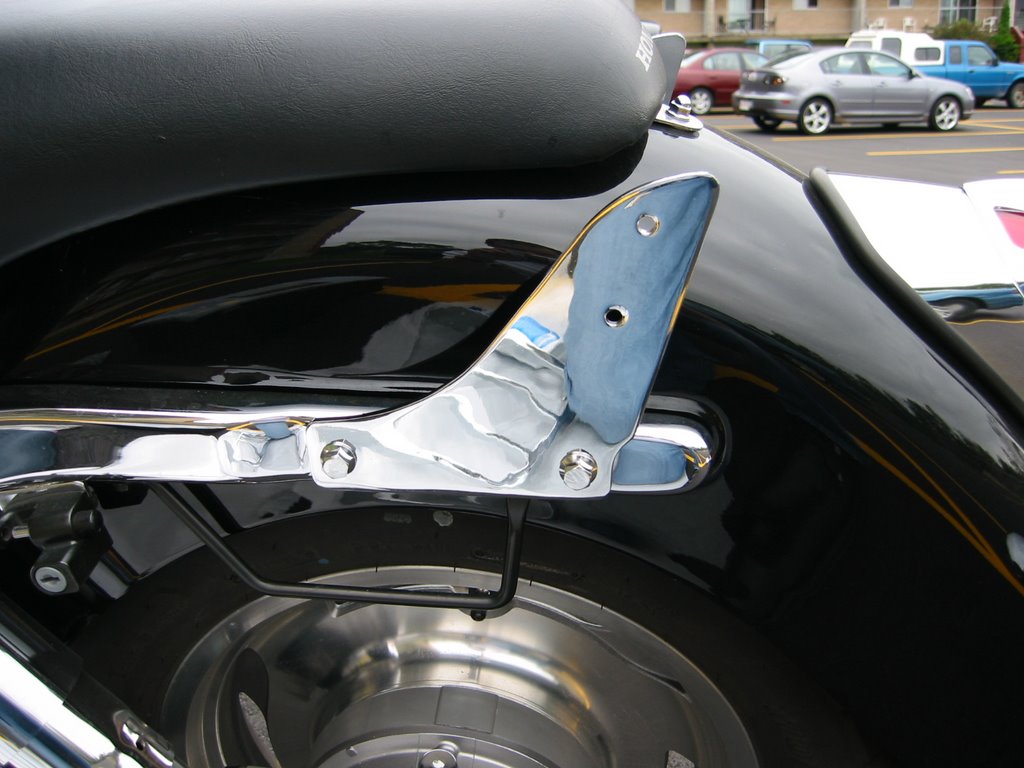 i assembled everything piece by piece on the bike. you could just have easily put it all together first and then mounted it. i did it piece by piece because the fully assembled backrest is a rather snug fit and i didn't want to risk scratching the original chrome on the bike, or anything else for that matter.
ok, with the brackets on we now have a choice. they pack two sets of bolts for attaching the backrest and luggage rack. if you only want the backrest, just use the short bolts. if you want the backrest and the luggage rack, use the longer ones.
 here is the point where some people would rather assemble it before putting it on the bike. i had to balance the luggage rack on my knees while i straddled the rear fender. then i had to slip the backrest on and put a long bolt in either side. it was a bit of a balancing act, but i like causing myself trouble like that...lol. the backrest held itself in place pretty easy due to the fact that it is a really tight fit.
 here i am putting one of the small nuts on one of the longmounting bolts. as you can see, there isn't a lot of room to play around. you are very close to the fender here and once you get the thumb wrench in, you have no room for slip ups. i've already got on chip on my fender (no idea how) and i wasn't in the mood for another. as you can see, the backrest goes on the inside of the brackets and the luggage rack goes on the outside.
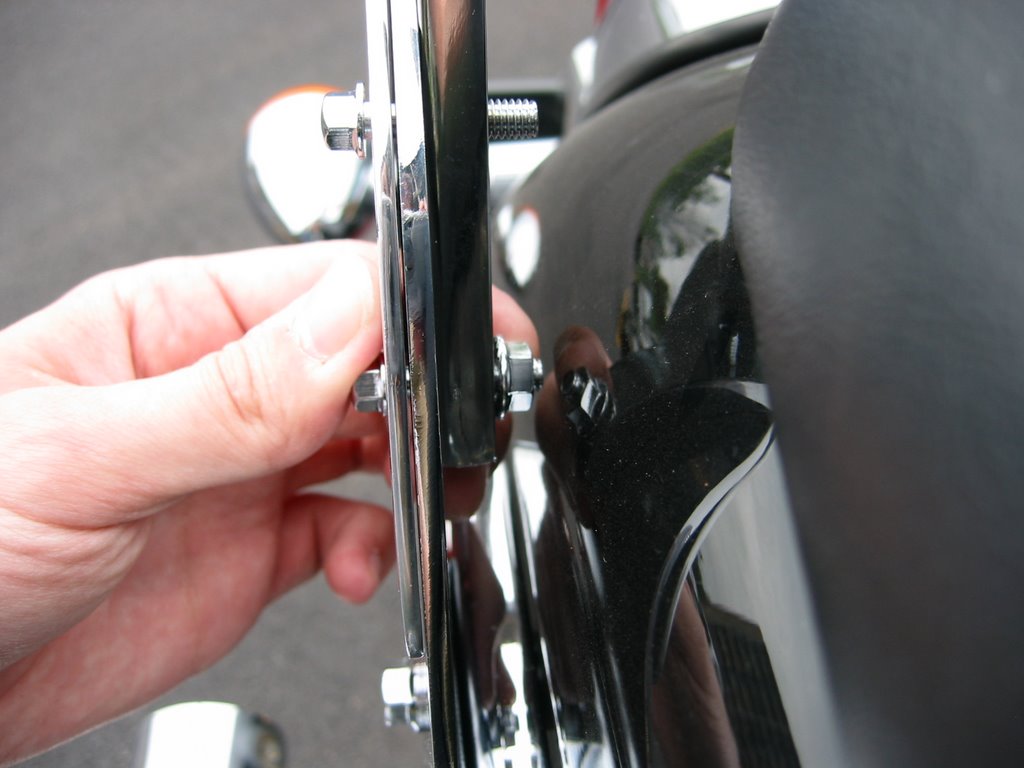 once you have snugged the nuts and bolts by hand, pop out the ratchet, the 8mm socket and the thumb wrench. use the thumb wrench to hold the nut and ratchet those nuts snug.
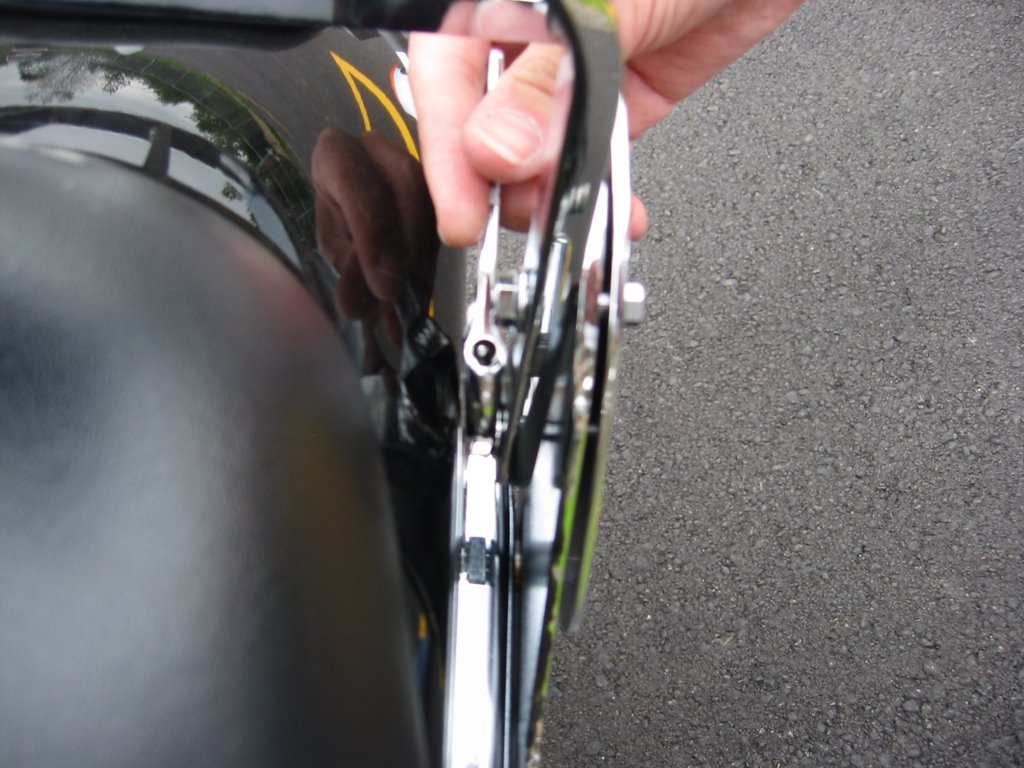 be very careful when tightening them up. these bolts are quite small and i'm sure that it wouldn't take much to twist the head right off or strip them. once they are nice and tight (careful with that thumb wrench next to the paint!) you can see how well all three pieces flow together.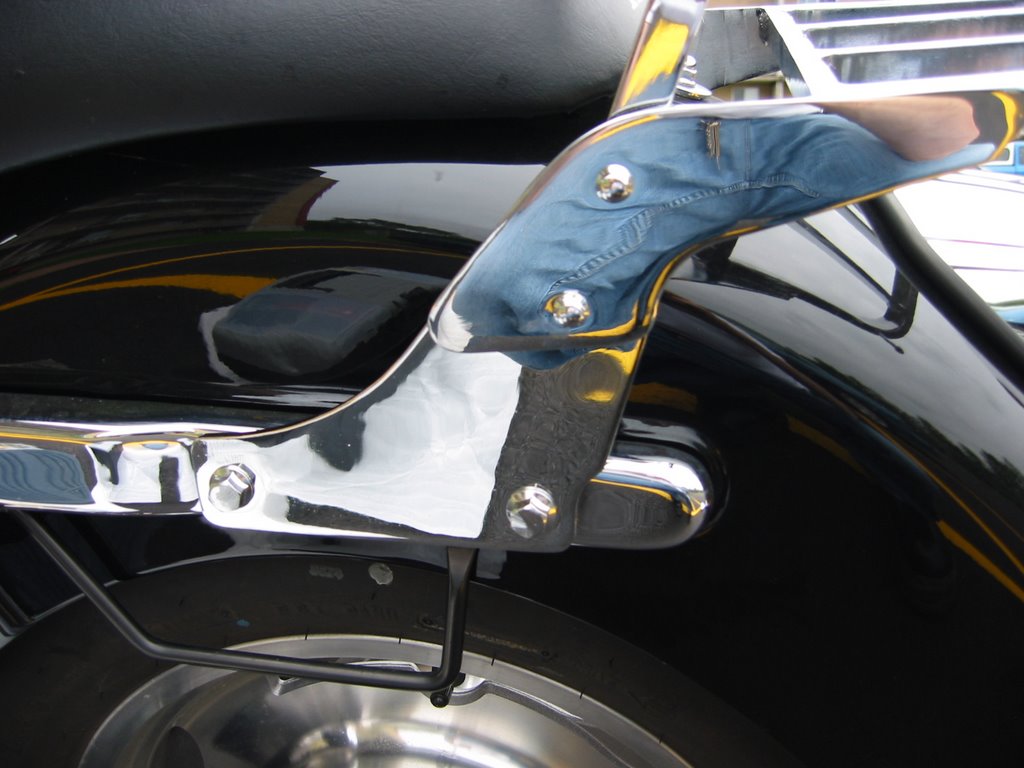
 a little addition here that i wouldn't have thought of normally. i grabbed the top of the backrest and jiggled it to see if anything would move. lo and behold, the pad actually moved. it either worked loose from shipping or it was sent this way. regardless, there are too small bolts that you can snug up right on the back, just use the 8mm socket.
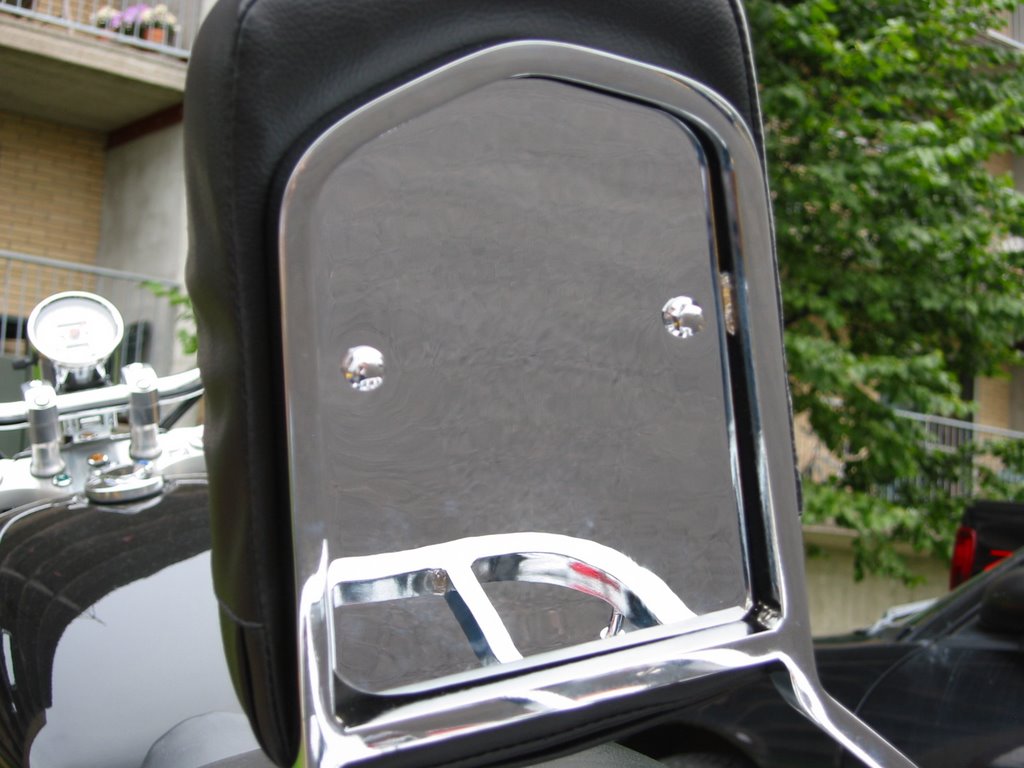 i did a final once over and made sure the rest of the bolts were nice and secure and wiped off the myriad of finger prints. after that, it was gear up time. i hit the road with my ratchet in my pocket. i stopped every now and then to make sure everything stayed tight, which it did.
i was actually wondering if this would look ugly on the bike or take away from it's looks. but now that i look at the pictures, i like it. the luggage rack is solid (rated for 2.7 kg or 6 lbs), the back pad is comfortable (yes i sat up there to test it :)) and over all it's a nice match to the Sabre.
install: easy (with minor acrobatics)
construction: solid
longevity: in testing