Showing posts with label new stuff. Show all posts

Oh shit…

Well now, it's been a while and here we are in September. I've thought about posting, but I don't like using this space as a woe is me area. I’d rather just hide away for a while and deal with things on my own. Suffice to say a lot has been going on and not all of it was good.

This summer has been absolute crap and a lot of my biker buddies have run into problems or have found other things to do, so I haven't gotten a lot of riding done. I still ride to work pretty much all the time, but weekend rides got stymied due to personal problems.

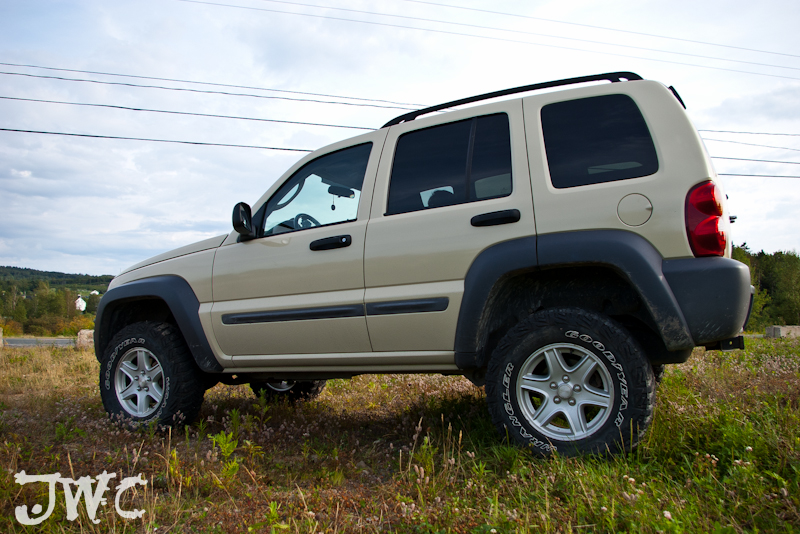
On the plus side, I finally got something that may make winter a bit more tolerable. I picked up a second hand Jeep and did a few modifications to it. Now the snow storms won't be so much of an issue.

Here she is the day I brought her home

Garnet red 2003 Jeep Liberty

Yeah, there is still snow on the ground there. These pictures were taken a bit before summer and it’s when she was completely stock.

 Reasonably rugged looking.

So, little by little I added things like a lift.

Bit more clearance? Yes please.

Then tires.

Now we are talking.

New Jeepin by Al upper control arms.

Better spring clearance and tougher build.

And lastly (definitely not finally) a new paint job.

 Sahara tan from the 2011 Jeep Wrangler

Loving the bars on the hood.

Still need a rim and tire.

I’ve still got a few other things to do. I need a new spare rim and tire and I need new badges to put on her as well. Those plastic bits need to be painted black too. All in all, I’m quite pleased and she is very fun to drive. Winter may actually be tolerable this time around.

On that note, the bike isn’t away yet and I’ll be riding for as long as I bloody well can!

Finally

IMAGE_373


Now to get the damn thing mounted…

K&N air filter

My new air filter arrived the other day.  I’ve always loved K&N filters and consider them to be a sound investment.  In some case you can get a horse power increase, but I just wanted a reliable reusable air filter.

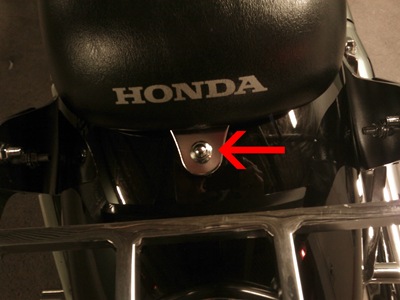
If you own a Sabre, you probably know that the air filter is under the seat so you start with the rear seat nut which is an 8mm socket.

IMAGE_284

Then you move to the left and right sides of the seat to remove the 12mm bolts there.

 IMAGE_285

Pull the seat off starting from the rear nut and note that there is a lip under the front of the seat that hooks into the frame.

IMAGE_286

With the seat off you have full access to the air box cover which is secured by four Phillips head screws.  One of those screws is wonderfully tucked away underneath the wire harness.  If you don’t have skinny fingers make sure you have a magnetic screw driver.

Three easy to get to, one not so much.

Pull off the cover and you can pull out the old filter.

Air cover removed.

When you get the old filter out make sure you clean out the air box of any gunk, dirt or dust that might be hanging around.  You don’t need to contaminate your brand new filter.

And here is the new pre oiled and ready to go K&N filter.  I love the look of these filters and the fact that they aren’t messy or dripping with oil like some others you can get.

Filter part # HA-1187

The great thing about this filter kit is that it came with a gasket to apply to the underside of the air box cover.  It’s baffling as to why there wasn’t one in there when the bike left the factory.

The included gasket.

Another cleaning tip: make sure you clean the underside of the air box cover to give the gasket a good surface to stick to.

Just peel of the white and stick it to the bottom of the cover.

Gasket in place.

Slide the new filter into the air box with the open end of the filter facing up and place cover back on.  Replace all four screws to secure the air box cover and you’re done.

STOP!

The gasket holds everything much more securely then the original setup and doesn’t make it anymore difficult to get the cover back on.

I’ve put on a few kilometers with the new air filter in and I haven’t really noticed any difference in horse power or speed, but I really didn’t think it would have made a difference anyway.  I wanted the K&N for the reason that it’s rechargeable and it literally pays for itself.

That’s it.  A nice and easy upgrade for your bike.  Only takes about a half hour to install.

The fairing

So, here’s the big thing added to Selene.

Rawr!

I’ve never been a big fan of windshields and the day I took the H-D Road King for a test ride cemented that.  I found the wall windshield to be big, cumbersome and only served to make the ride oddly uncomfortable.  The batwing on the Street Glide though?  Superb.  It had looks and the ability to take the wind away from my chest and hands.

I knew that Memphis Shades made a universal batwing, but finding the mounting hardware in grand old New Brunswick last year proved to be difficult.  This season, Memphis Shades has everything readily available and a few calls produced the entire kit for me in about a week.  Keep in mind that there are three things you need to order for a complete install.  The fairing, the mounting hardware (or plates if you already have a mount) and the windshield.

So, as usual, here is my little write up of the install and my thoughts on the addition to my ride.

The batwing came nicely secured in a full size box wrapped in foam.  Memphis took a good amount of measures to make sure it was delivered scratch free and in one piece.  I would suggest handling the fairing with some kind of cloth gloves on to prevent scratching.  Keep in mind that the fairing is molded Lucite® acrylic and easily scratched.  They supply every tool you’ll need to mount it except for the 8mm socket wrench to remove your signal lights.  The biggest problem you’ll have is trying to get the mounting equipment off the vacuum wrapped cardboard.

Mouting hardware.  Mine aren't black.  Doesn't matter, you dont' even see them.

With everything out of the boxes and plastic it was time to remove the signal lights.

8mm bolt holding signal light bar.

Signal bar off hanging by the wires.

With this done slip the lower fairing mounting bracket in behind the signal light bar and reinsert the bolts.

Lower fairing mounting bracket in place.

I wasn’t big fan of how close the upper section of the bracket comes to the fork covers.  In all likelihood it will come in contact with them if the bike gets jarred a lot.  The only bonus is that this mounting system will likely never come off the bike.
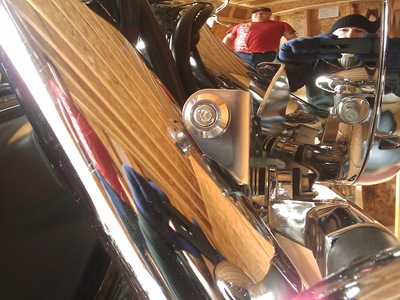
It's really really close to the fork covers.  Also note my helper.

Next up, removing the upper triple tree pinch bolt with the supplied 6mm Allen wrench.  When these are out, you can place them off to the side as they won’t be used again.  The kit comes with new long bolts for the installation.
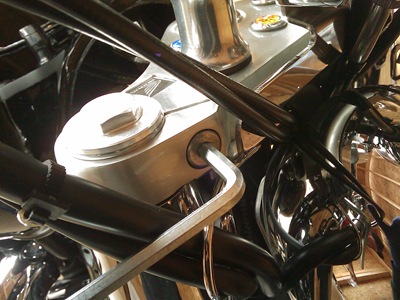
Removing the pinch bolt.

Now take the L-shaped upper brackets and remove the lower Allen bolt (opposite the L section).  Pop the L-shaped upper bracket in place and re-insert the Allen bolt, but don’t tighten it all the way.  These L brackets must be tab up and facing the forks as per figure 2, below.  Put in the new longer Allen bolt with the spacer in the triple tree pinch bolt hole.

Figure from installation sheet.

Lower Allen bolt.

Upper L bracket with bolt & washer in place.

With the brackets in place we can move on to the fairing itself.

Mounting the fairing brackets.

Please, keep in mind that the brackets get mounted facing inward.  I got a little ahead of myself and put them on completely wrong.  You find out rather quickly once you try to mount the fairing to the bike.  Please note the picture below illustrates the WRONG way to put it on.

WRONG!!!

If you put the bolts at the bottom of the holes in the bracket you will end up with the fairing as close to the headlight as it will go.  It looks the best this way and will help block more wind.

Now that you’ve mounted the brackets the right way, go ahead and slip it onto the lower and upper bushing assemblies.  I found this best with help…which I thankfully had around for the whole install.  The fairing will go on, but it will give you a bit of a fight.  If I was by myself, I could very well have scratched the fairing trying to get it onto the mounts.

You have limited adjusting room with the upper bushings and can move the fairing forward and back with them left loose.  Find the best spot for the fairing and tighten them up.

Upper bushing adjustment space.

In fact, now is the time to tighten up all the bolts.  The last thing you need is this beautiful piece of plastic taking your head off on the highway.

Now the windshield itself…which has to be ordered separately.  Yes…separately.  Anyway, I ordered the smoke black windshield and it looks fantastic on the black fairing.  It’s simple enough to install, but again it’s easier with help.  One person holds the windshield in place, the other installs the hardware.  Again, use cloth gloves if you have them, the windshield is easy to scratch.

You get three nylon nuts, washers and Allen bolts.  I’ve got them mounted ass backward on my windshield, still wondering if I like it that way or not.

Bolt inside, nut outside. Instructions say it should be the other way around...

Tighten it all up and…that’s it, you’re done!

Make a final check on all the bolts and pat yourself on the back.  Or get your buddy to point at the fairing saying, “Now that looks cool!”

Now that is cool!

Riders eye view.

Outside, minus my saddle bags.  She's kinda skinny without them.

My thoughts?  I love it and Selene loves the attention.  It’s made a huge difference in the amount of wind that hits my chest, has made my April rides that much warmer and makes the highway a lot more comfortable to ride.  There is a small amount of buffeting, but compared to the amount of wind I’m used to it’s nothing to complain about.  I bought the fairing so I could take it off when I didn’t need it, but now I think it looks so good that I’ll never take it off.  Oh Gods…I’m a convert!  *hangs head in shame*

I do intend to get the lower deflectors and the chrome windshield trim later on.  The chrome will just accent all that black and I’ve read that the defectors make quite a bit of difference.

Windshield trim. Lower deflectors.

I will not be getting the fork lowers as the only ones I can get attach to my fork covers and I’m not willing to do that.

That’s it.  Hope you enjoyed the write up.

Motorcycle watering can

So, in my efforts to keep Selene clean I have invested in one of these:

Motorcycle watering can

You see, we live in an apartment building and there is no access to outside water taps.  I was finding it rather difficult to keep filling up buckets, dragging them downstairs and pouring them over Selene.  This holds as much as the buckets, but I use less of it because I can actually direct the water where I need it.

I used it yesterday to clean up Selene for the ride on Saturday and It works like a charm.  You can pressurize it, it's made of metal and you can control the water to be a stream or mist.  I think I may have to spraypaint it black though...

New shoes

Well, I'm a little late with this, but as you know...I've been forgetting to catch up on a lot of things. :)

So here she is in all her glory sporting her brand new Metzelers.

Shiney Selene

New rubber

New rubber

Ain't she sexy?

It's been a while

But it's been a busy while.  We are done with the Neon and we were able to get a lease on a 2007 Pontiac G5.  It's a wonderful car that will suit our purposes perfectly.  After four years, we can get rid of it and get something new.  You can't go wrong with that.  Here is a shot of the new mechanical addition to our family.

Our new four wheeled baby

With that done, it was time for me to finish cleaning up Selene and get her home.  That got seriously hampered when the storage company decided to lock me out of the building.  That was on Friday which meant that I wouldn't have access to my bike for the entire weekend.  Add that to the fact that I had to have the bike out of there by Saturday and you could say that I was slightly miffed.  We got that cleared up on Monday, but I still never got to finish my clean up.  Now I get to freeze my butt off cleaning the last few parts of Selene.

In between all that, we managed to get out to the Blue Knights Motorcycle Show.  It wasn't a large show, but there were a number of nice bikes there and I did get a few good pictures.  Check out the slide show at the bottom of the post for all of them.

To top it all off, I finally get the bike home with hopes to be able to ride it to work tomorrow and this happens...

Snowing...again...

Ah well, at least we have a new car.  :)

Look what else I got...

I've got Selene's new rubber. This white stuff can't melt fast enough...

the new tire hunt

the hunt for new tires has been going on for some time now. the stock Dunlops that are on Selene have well over 13,000 km on them and are quite worn. the rear tire also has a plug that was the result of a nail picked up in Quebec. the search has been a battle of brands and prices, meaning i want a good brand at a good price. the Dunlops were great, but i want something better.

i've been all over the net and have even debated about buying my tires from the states and having them shipped to Canada. Cruiser Customizing always has great deals and were actually selling tires at 40% off regular price. i really didn't think i could get a better deal then that.

before i ordered, though, i figured i would check out a couple of local places and give them a chance. i'm all for sinking my money locally.

okay, tires sizes:

front: 120/90 R18
rear: 170/80 R15

tire brands:

Pirelli MT66 Route
Avon Venom
Metzeler ME880

i still chuckle at the fact that i had Pirellis on my Kawasaki 440LTD, but i digress. a few calls around town gave me these average prices (both tires, tax not included, in canadian funds):

Pirelli: $351
Avon: $396
Metzeler: $498

Cruiser Customizing was giving me prices of (in US funds):

Pirelli: $225
Avon: $340
Metzeler: $347

it was really looking good for Cruiser Customizing. i could get a damn good set of tires (Metzeler) for a heck of a lot less then any local place. even with the duty and exchange factored in, i would end up saving money.

then i called the last local place on my list. a place that i'd never seen before due to the fact that they are a little out of my way. a little place called Levesque Recreation. i hit them up with the brands and a few minutes later, they came back with prices:

Pirelli: $261
Avon: not listed in their books
Metzeler: $375

here is the real kicker...those are the straight prices with taxes in. sold! i couldn't believe the price difference.

i went down the next day to check out the shop and double check the prices. they are a small outfit with a small stock of helmets, tires and some parts. they do mechanical work on practically all makes and models (i could see a H-D and a snowmobile being worked on in the garage). there was also a beautiful boxer running around and investigating everything. he was behind the counter the whole time, but would stand up at the counter staring at you while chewing on whatever he could get his teeth on. i'll have to snap a picture of him when i pick up my tires.

so there you have it. it really does pay to shop around. it's a lesson that i have to learn time and time again. i'm famous for impluse purchases...ask joey...

the year's past

wow, another year gone and so much has changed. this year has seen it's fair share of ups and downs, believe me.

the year started in the middle of my marrige spiraling downhill. i was in a slump, a bad one. one of my worst by far. it happens to me every now and then and most times i can squash it, but that time...i needed a change and if i didn't get it, all hell was going to break loose. i shunned the people closest to me, i took so many days off work that i ran out of sick time before the end of january and i was generally self destructive. it wasn't a good time for all involved as you can well guess. this was all carried over from last year and joey can attest to the type of ass i was being. i guess the experts would have called it a "mid life crisis", but i'm not much into the experts. i refused to see anyone (that's normal for me) and vowed to figure things out myself.

things that didn't help me out were:

living in an apartment that was below ground
joey had a depressed time and clung to me

the two of these issues made me feel trapped and i don't like feeling trapped (not like anyone does, really). i couldn't really go outside because we had no back yard and going out in car meant that joey wanted to go as well. yeah, it was a bad time for me. so i found other escapes...one of them being world of warcraft. i won't say i got addicted to that game (i'm a gamer, i love games), but i will say that it was the perfect escape for me. so everything else got ignored.

near the end of february i started coming out of my slump and thoughts of divorce were in my mind a bit less. around that time, joey started pushing me to get a bike for my own transportation. so i guess my "mid life crisis" was squashed by a little out doors time. after that, things got steadily better.

in the summer, we moved and the new apartment was great. we got a veranda, a view, and a really quiet area. it was pretty much perfect.

after that, things steadily got better. i invited joey to a trip that i had intended to take myself and it ended up being quite a bonding experience. there's really nothing like taking a motorcycle trip. just two riders and two wheels. i really don't think i could have made it without her. having her share the experience of almost running out of gas, riding with a nail in the rear tire, riding in the rain, freezing to death trying to find a hotel...any hotel. an experience that i would have traded for nothing and hope to do again.

keep in mind that was a short synopsis and i haven't gone into detail about everything, but it covers most of the bases.

thank you 2006 for bringing so much change into my life and giving me the guts to do what is right.

here's to changes, good or bad and the company of people who love you.
Happy New Year to you all.

the gloves

ok, as promised, here are my new gloves. :)

i picked these up at the local H-D dealership, the same place that i got Selene. they treat me well, so i'm always there bugging them. i was lucky to have a 50 dollar voucher for this purchase as the gloves were around 60 bucks. i picked up the gloves and an insulated leather face mask.

Gloves and tags

for the most part...i have no idea who makes these gloves. there were a bunch of tags on them, but nothing identifying the brand name. let's start off with the first tag.

Thinsulate: microfiber technology that provides warmth without bulk for greater comfort.

Hipora: a water proof liner that shuts out water, but allows moisture or warm steam from the body out.

Cordura: a light, but durable fabric that's resistant to tears and punctures.

Schoeller-Keprotec: a kevlar containing material that has extreme tear resistance.

so...yeah...there is a lot in these gloves to keep you safe and comfortable. i still have no idea who makes them though. it's almost like all these companies got together and said, "hey! let's put ALL our products in one pair of gloves!"

i have to admit, the build of the gloves is nice. the sturdy look is complimented by double stitching everywhere. the wrist strap keeps the gloves snug and the gauntlet has enough room (due to the Velcro strap) to fit over the thick cuff of my leather jacket.

Glove back

as you can see from the palm view, there is a lot going on. the double stitching applies here as well which is a blessing. if a motorcycle glove is going to give out on you, it's going to happen on the palm portion. i recently destroyed a brand new pair of winter gloves due to the constant twisting of the throttle. the one part on the palm that i love is a strip of leather that runs from the thumb to the index finger. it adds a lot of grip and pretty much gives me the ability to crank the throttle with just a thumb and a finger.

Glove palm

unfortunately (fortunately, actually) our cold snap has all but gone, so i haven't had much of a chance to test how warm they are. we have been having a ton of rain though, but i really don't feel like riding to work in the rain just to test out the gloves. i've got better water proof tests in mind, like wearing them in the shower...wait a minute...that's just weird...

so far, i have nothing but praise for the gloves, but like i said...i haven't had much of a chance to fully test them. they are very comfortable and not at all restricting when riding. the couple of times that i've been on the bike my hands have been sweating, so i'm taking that as a good sign.

i'll be riding for sometime yet, so i'll have plenty of time to give them a full workout. expect updates on them in the coming weeks.

jafrum helmets

have i ever mentioned how much i love getting packages in the mail? even if i know what it is, i love it. :)

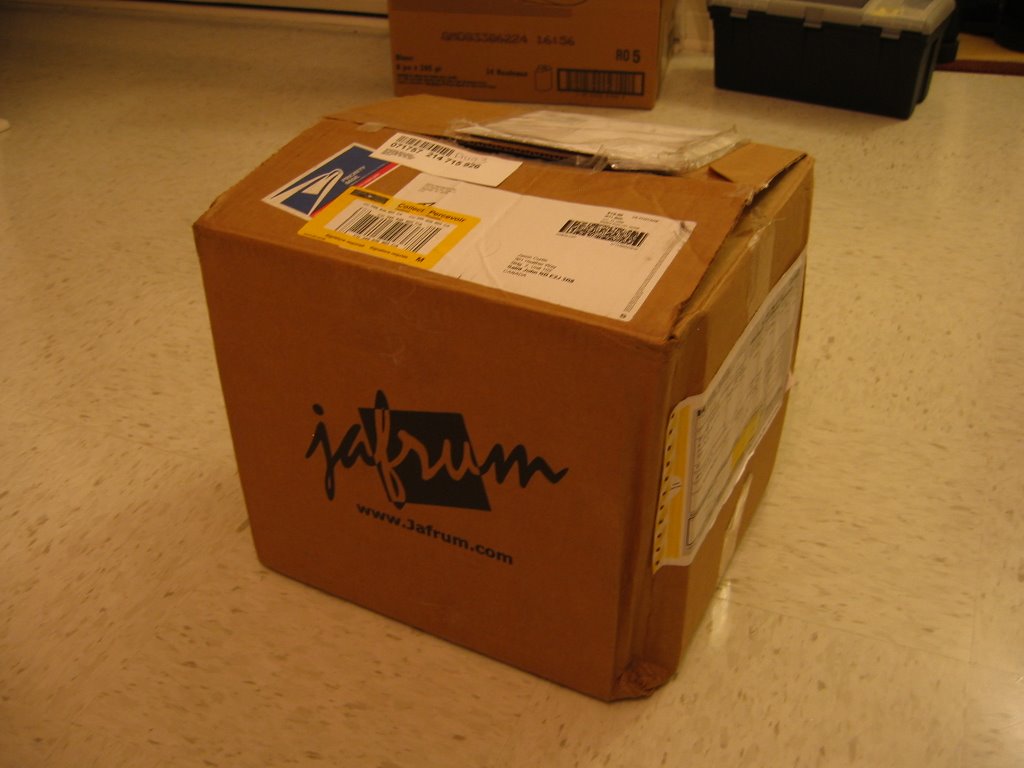
anyway, new package from Jafrum arrived...well actually, i had to go pick it up due to the fact that our mail-person is too damn lazy to buzz our apartment. but i digress...my helmets arrived! of course, in my true fashion, pictures and opinions follow.

the box came in really good shape, no holes or punctures. i was actually a little worried about having helmets coming through the mail, but it arrived in better shape then i figured it would.

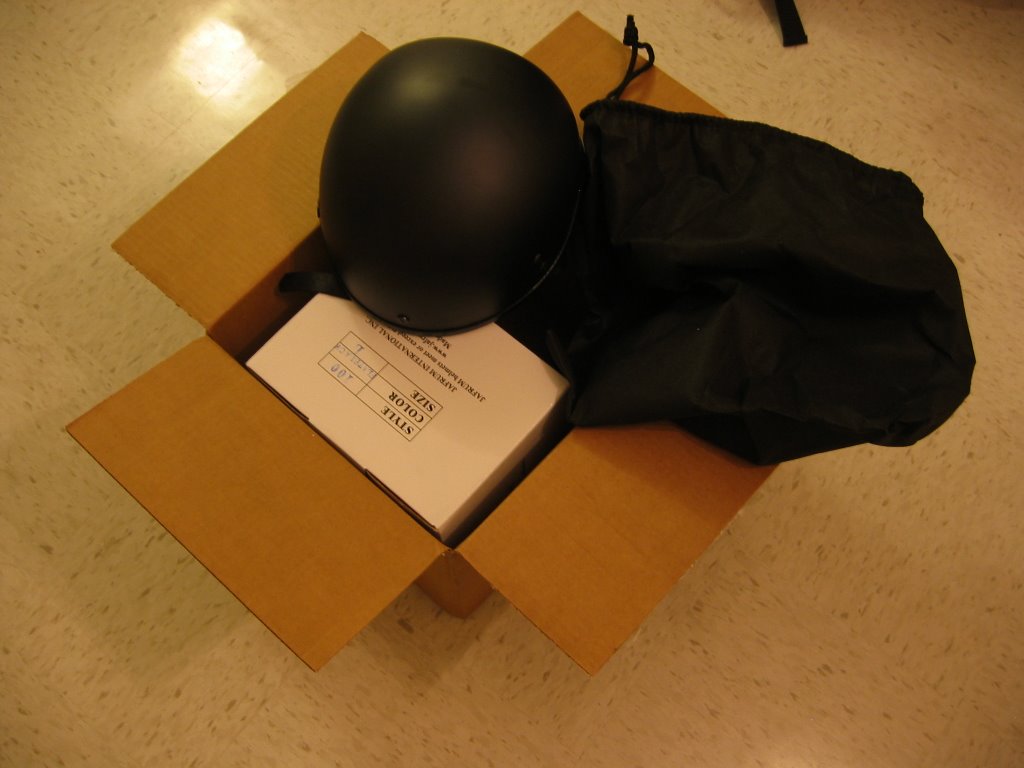
here is the opened box. inside were the two helmets ordered for me and my wife. each helmet was in it's own "one size fits all" carrying bag (read: too big for the shortie) and it's own white box. no damage done to the inside boxes at all. this would mark my first experience with half helmets/shorties/skid lids/brain buckets/etc. and my thoughts will follow soon after this post.

the helmets are identical, so what i say about one applies to the other. it's flat black with a small sun visor on the front. the visor can be removed by unscrewing three large screws in the front of the helmet. once removed, you will have to put the screws back in to fill up the unseemly holes. i removed mine as i thought the visor looked silly. joey left hers on, which should resolve in any confusion as to who owns what helmet.

the construction seems solid and the fit is good for me (size large). joey says that hers is a little large, but we both have the same sized head. i wear a bandana under mine, so it's pretty snug.

the strap system is my only real complaint. these helmets use a seat buckle type of system. while this should make putting the helmet on nice and easy, it ends up having quite the opposite effect. the buckle is small and rather tedious to snap in place, you often miss the entry point on the receiving end of the buckle. also, the adjustments are made on the part that buckles in. at first glance this seems pretty secure, but after a while of riding around it actually works loose and the helmet becomes somewhat mobile on your head. i have never been a big fan of buckle systems on helmets. in my consideration, the D-ring system should be the only system used.


thankfully, there is another option. they had the foresight to leave the D-ring system on the helmet as well. the only bad part is the fact that you will still have the buckle hanging off the side of your head. i may do a little modifying with my trusty dremel tool.

over all, the helmet is quite comfortable and i am in no way disappointed with my purchase. the padding inside is soft and i have found no pressure points at all. after a ride of several hours, i have found no discomfort at all.

i'll do a final review once i get a full month out of the helmet. that will give me a good idea as to what it will be like in regard to comfort and longevity.

mind you, this has not become my main helmet. this lid is only used for short hops and rides to work. my Icon Alliance full face will be my helmet of choice for any long distance riding.